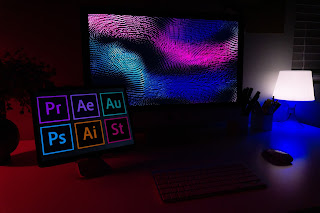
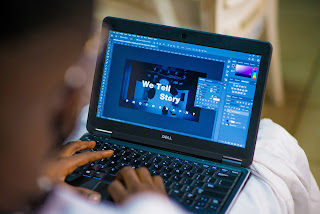
It's everything in one, really powerful, and was developed by Adobe. There is a brand-new platform for producing graphics, editing images, and editing films. The product is known as Adobe Creative Cloud Express.
Previously there was a version called Adobe Spark, but it has all been integrated into a single web-based platform that you can use on your computer and they also offer versions for your iPhone and Android phones. In this post, I'm going to walk you through the basics of using Creative Cloud Express. If you've ever created images using a tool like Canva, for instance, you'll recognize a lot of this.
When you first arrive, you'll be on Adobe Creative Cloud Express, formerly known as Adobe Spark. You may just start using it for free and then sign into your Adobe account if you have one because it has been significantly improved over Spark's previous state. On the page after, you can make one if you don't already have one.
Text Edit
- Following that, you'll see various possibilities for what you may do on the right side. Therefore, you might edit the text in this place if you so desired. Since it took care of the space and sizing for me here, I could type in my own content. There was nothing I needed to do.
- But if you wanted to change the size of something, you could just grasp these corners and adjust the font size as you like. I could easily change the color if you wanted to do so because there is a color option right here. If you don't like something you see, like text or shapes, for instance, you may go ahead and create more shapes and other things using the font option right here.
- You may just press the delete key to remove this from your computer, giving you this space to edit and add new content. As a result, you could just grab it and drag it over here if you wanted to add more text, perhaps in this box, and it would be placed exactly where you wanted it. You can double-click on anything that you can alter to bring up a text menu and then see the same choice once again.
Colorize the Background
Here are some additional options for you. I only chose the background since you could modify its color. You could select a different color here, so if I wanted to, I could go ahead and do that. However, because professional designers created the templates, I typically leave the color choices alone because they are aware of which hues go well with which hues, and I don't need to make that choice in this instance.
Templates
These tools for designing Instead of starting from scratch, I prefer to use templates because they were already professionally prepared by someone else, allowing me to tweak them after they have been created.
- You may therefore discover a variety of uses for this if you click the + sign here. He has a tonne of options, like eliminating backgrounds, creating gifs, and merging films, so you could create a logo, a flyer, a video, an Instagram post, or a Facebook post right from this page. In this piece, I'll describe a few things to you, so let's get started.
- Consider what this film is attempting to do. I'm going to search right now, and it will bring up a tonne of various templates for you to select from. You can also select by category. Let's assume that I wanted to work in education. I'll only see the education-based layouts after that, and only education-based YouTube thumbnails will be displayed. Then I can alter it from there, but first, let me choose one that I like. Let's choose this one right now. You might advise people to start here and select this template, for instance. Everything will happen on this canvas, which you have provided.
- Now demonstrate what you're currently viewing on the left side in full. This box adjusts by the menu you are now on. So, if I go to the photo menu to obtain a list of photos to choose from, the text will offer me possibilities for text, and similarly, I could search for icons. Let's just start with text in this case. If you wanted to modify this template, you could do so through the template menu, where everything based on the education search would be displayed to you, or you could just start over and select a different template.
Photos
Next, as I frequently utilize images as design components, feel free to add one of your own. I'll just go ahead and do it now. I'm going to upload this one now so you can see it. Let me go ahead and delete the background from this picture if I choose to. Simply by selecting this option, I'll get rid of the background from it. Instantaneously, the background has been eliminated, and I am now presented with several more complex options.
I could grab myself, let me go ahead and erase this paragraph actually, and grab this one. I'll place myself in this corner and extend it out so I'm a little bit bigger over here. Since this is by Adobe, it is employing the power of Photoshop, which no longer requires any technical or sophisticated understanding.
I will make use of iconography. These icons will be removed by me. Imagine that I wish to utilize my own icons. There are several different icons available when I select the icon tab. Considering that this is
Adobe Creative Express on a computer, let's utilize the icon of a computer. You could also get this one from here, move it over here, and stretch it out here. Additionally, if you were to look for a phone here, you could move that over here as well. Let's continue to linger on this. All of these items might also have their colors changed. They are here now.
So click away after changing this to a blue icon. You can now see how simple it is. If you prefer a background other than a simple color, you can choose from a wide variety of options by going to the background tab. Let's say I desired a more sophisticated solution. I don't need to move it freely because I'm going to pin it to the background. That also appears to be rather intriguing. Playing around and choosing different backgrounds would be possible.
Design Resources
The use of frames and other similar design elements, such as film strips, could make design assets rather cool. You could make use of these. Perhaps you could do something like this if you wanted to add something in the corner, for instance, to give it a little bit of a unique design. Delete that right away.
If you want your logo to be a part of your design, you may upload it here. You can always go back through any of these and make some adjustments. There are a few things you might do when you feel satisfied with your design. If you were producing this for various systems, you would need the premium version because it allows you to resize this for other platforms.
This is the standard YouTube thumbnail size because other platforms have different sizes for them, but if I wanted to build a square for Instagram, for example, there's the resizing option, so I don't have to construct from scratch, but you don't have to do that. If you were to save, you could recreate the design several times from the start.
There is also an animation option, so if you wanted to animate the text, for instance, you could do stuff like that, but once more Then I could share it or download it like I usually do, in which case I could save it as a video by pressing the download button once more. I'm not interested in doing that. In this case, it's only a jpg, so I'll select that and download it. The most popular file types are JPEG and PNG.
Finally, Those are for photographs. I'll go ahead and save it, and then I can either continue editing or go back to the home page and start over from fresh.


_11zon.png)

No comments:
Post a Comment